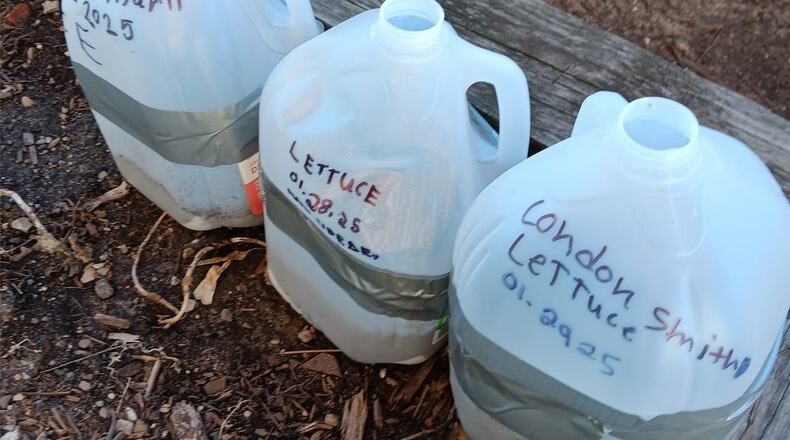
You need a clear or translucent plastic container; gallon milk jugs work the best. The milk jug serves as a mini greenhouse and the seeds are subjected to winter freeze/thaw cycles that lend to toughening up the seeds. The result is sturdy plants.
Some say these sturdy plants outperform those that are directly seeded in the spring, but I didn’t find any research to support this. I will learn and have anecdotal evidence this year.
Not all seeds are suitable for winter seeding. Vegetables that tolerate cold temperatures include kale, Swiss chard, Brussels sprouts, spinach, collards, and other frost-tolerant greens.
Native plants that need cold stratification (cold temperatures for a specific period) and perennials that are cold tolerant or self-seeding are suitable. This includes coneflowers, hollyhocks, black-eyed Susan, and Shasta daisies.
Herbs such as sage, thyme, oregano, dill, cilantro and fennel can also be started in the milk jugs. Basil would not be a good choice to start outside at this time because it prefers warm air and soil temperatures.
Wash the milk jug with soapy water and let dry. Use a box cutter or scissors to cut around the container about four inches from the bottom. Leave the area around the handle uncut as this can serve as the hinge to open and close the top which serves as the greenhouse cover.
Using a screwdriver, nail or sharp knife to poke holes in the bottom of the container allows for drainage. The seedlings can’t stay wet, or disease will occur.
Use a soilless mix designated for seed starting and fill the bottom of the container with about three inches of soil. Moisten the soil before planting seeds. Close the container and seal it with duct tape, leaving the lid off for moisture to get inside.
Set them outside in a sunny but protected area. I am going to place mine in a crate so that they don’t fall over or blow away.
When the temperatures are suitable for germination in the spring, you will see plants coming up. When this occurs, open the lid during warm sunny days so the heat doesn’t build up in your mini greenhouse.
The first leaves that appear are the cotyledon leaves that provide nutrients to the plant in the early stages. The next leaves are true leaves and will begin to photosynthesize and provide needed nutrients.
When there are about two sets of true leaves, you can carefully separate the seedlings and transplant them into the garden or individual containers to grow them for a little while longer before planting them in the garden.
Have fun and try it – I am.
Pamela Corle-Bennett is the state master gardener volunteer coordinator and horticulture educator for Ohio State University Extension. Contact her by email at bennett.27@osu.edu.
About the Author
